Note: The screenshots used in this guide are from Unreal Engine 5 (Early Access) but everything here is compatible with most previous and future versions of Unreal Engine (4 / 5 / beyond).
The basic idea behind an Event Dispatcher (or Delegate in C++ land) is that one thing is shouting something to whoever is listening.
We will look at two examples; one for a Blueprint Event Dispatcher and one for a C++ Delegate.
Examples
Example #1 - Open Door (Blueprint)
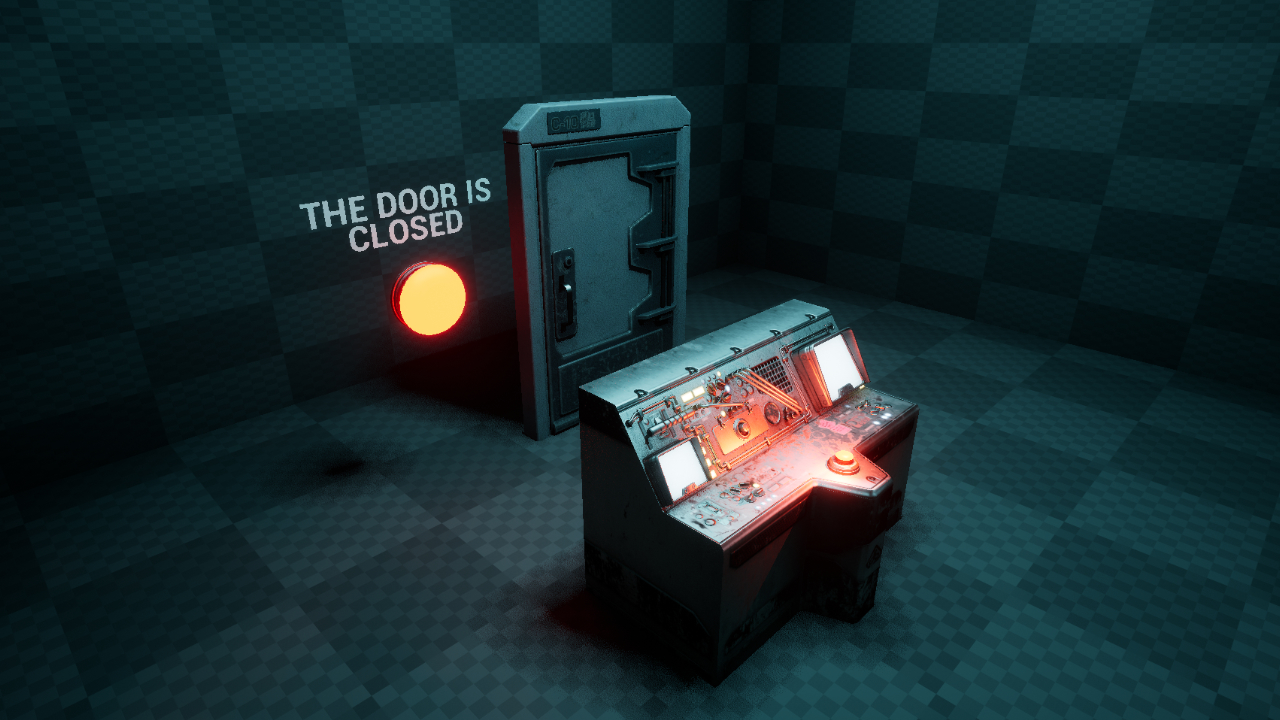
In this first example, we have multiple uses of Event Dispatchers. The idea here is when the button is pressed, the door should either open or close. When the door state has been changed, the two objects beside the door should let us know what state the door is in.
The button has an Event Dispatcher called “ButtonPressed” and has no knowledge of anybody listening, it will just shout this to anybody. This is fired when “Interact” is called from the player character.
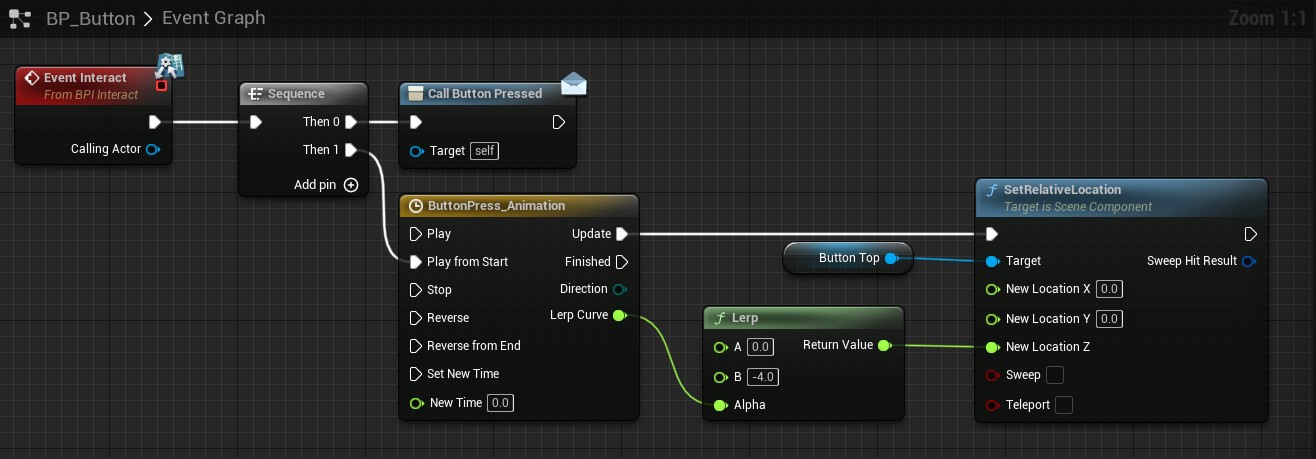 When Interact is triggered, execute our Event Dispatcher and play the button press animation
Within BP_Door, we’re saying at the start “Listen for when the button shouts “Button Pressed!””. When that happens, if we’re closed, open us and if we’re open close us. After that, play the animation to move the door. When the animation has completed, shout to whoever is listening that our state has changed and send along our new state too.
There are two seperate actors that listen for BP_Door and react differently to showcase how one Event Dispatcher can be used to communicate with many things.
BP_DoorReport_Text is an actor that waits for the door to shout “My state has been updated!” From here, it uses the information told at this time to decide whether to set the text to “CLOSED” or “OPEN”.
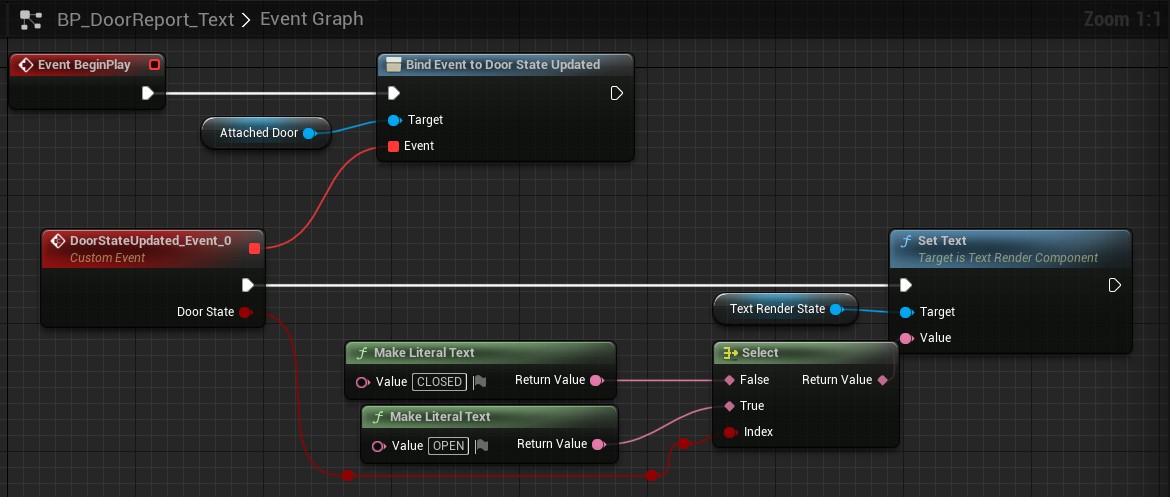 The blueprint flow of BP_DoorReport_Text
The similar (but visually distinct) BP_DoorReport_Alt listens for the door when the game begins but also creates a dynamic material, so it can change the color when the door shouts about its state.
 The blueprint flow of BP_DoorReport_Alt
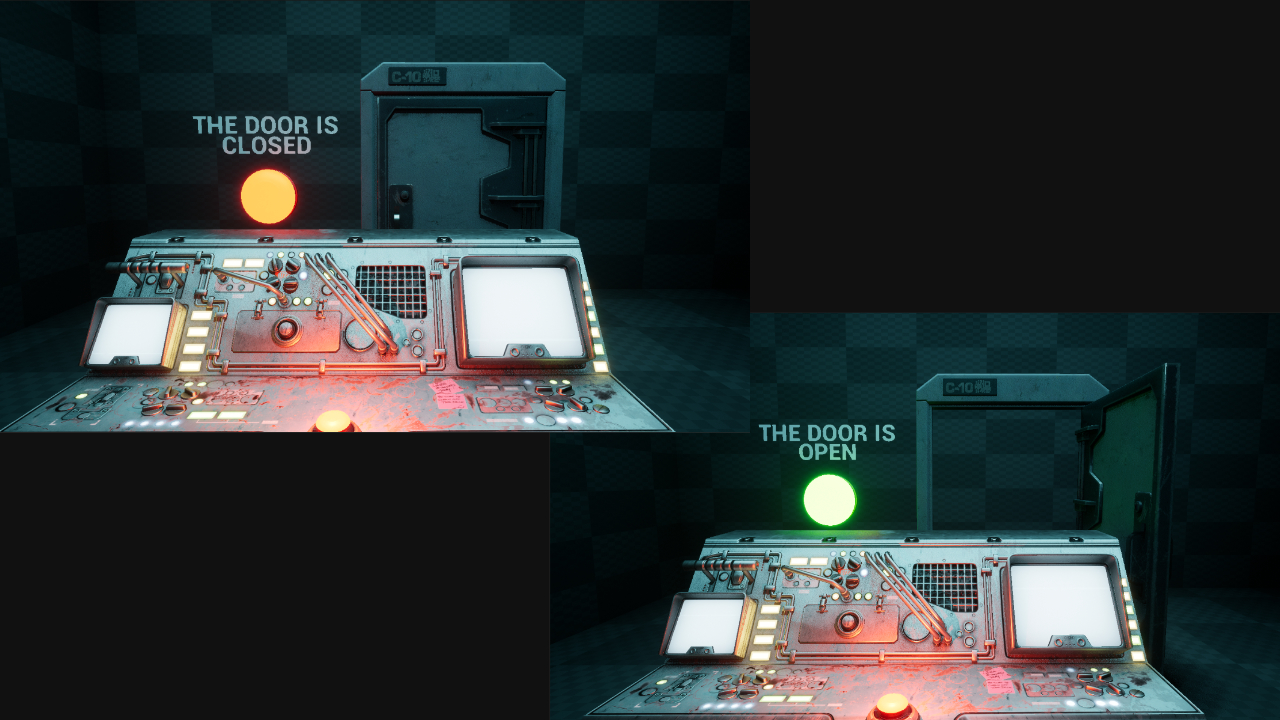 Interacting with the button starts a chain of Event Dispatchers to correctly change and show the state of the door.
Example #2 - Player Collecting a Coin (C++)
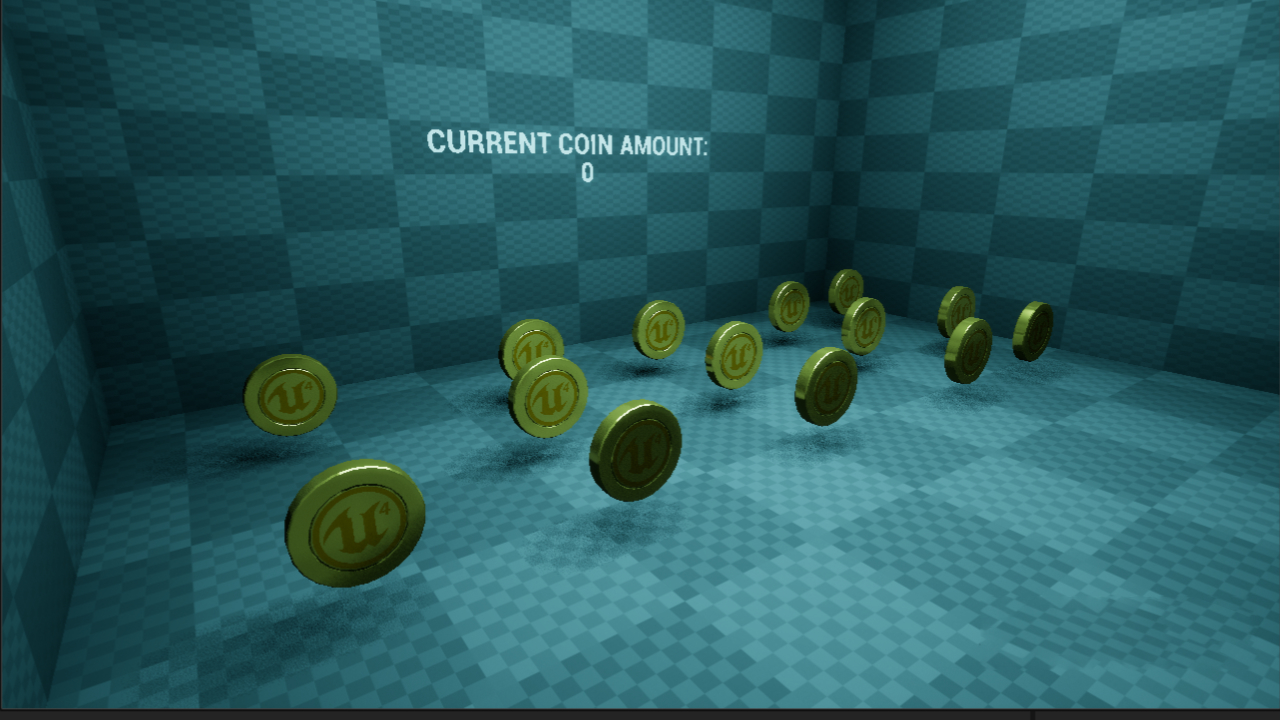
To show the simplicity of what an Event Dispatcher looks like in C++ (It is a Delegate, not an “Event Dispatcher” but works in an almost identical fashion), the second example is a simple coin collection minigame.
As with the last example, we have an object broadcasting out and then two objects receiving that broadcast and acting accordingly. We’ve added a seasoning of Blueprint support to allow us to receive the delegate in Blueprint as the important thing in this sample is the broadcasting of information, not what we do with that information itself (as we have already dealt with that in the previous example).
If we take a look at the AKF_Pickup.h, you can see where we have declared the delegate outside of the class and then used that declaration as a variable in our variable list.
The parts that are specifically tied to the Delegate:
We mark the UPROPERTY as BlueprintAssignable due to the fact that not only does this mean we can use this Delegate as an Event Dispatcher in Blueprint but we still can communicate in C++ land, giving us the best of both worlds.
The other parts to this .h file are giving us a mesh so we can see the coin and a sphere component so we can do something when the player overlaps this actor. Just like with the BlueprintAssignable flag, we have added BlueprintNativeEvent to our Overlap function to give us the power of both worlds, allowing us to deal with this overlap either within our .cpp file or in a Blueprint child of this actor.
Over in the .cpp file (AKF_Pickup.cpp), we are setting up the file, creating our components and listening out for the overlap. When the overlap happens, we simple broadcast to anybody listening that we’ve been picked up.
The important part of this code we want to look at is the broadcast.
Heading back into the project, we have placed the C++ class around the map (Map_Example02). We have set the mesh and created two classes - one on the Blueprint side to listen out to the broadcast; BP_PickupCounter (another actor) and the other, a C++ backed UMG_CoinWidget (A UMG) to showcase how we can communicate with the C++ created delegate in both Blueprint and C++.
 BP_PickupCounter waits 0.2 seconds before rounding up all the coins in the level to make sure they have all spawned. When they broadcast, we increase the coin amount and update out text.
In the C++ source for UMG_CoinWallet (UW_CoinCounter_Base), you’ll notice that the only thing reserved for the delegate in the .h is a UFUNCTION (void CoinCollected) that is going to fire when we hear what the broadcast has to say. This needs to have the same variables as what is going to be broadcasted or we won’t correctly recieve the broadcast.
Looking at the .cpp, when the widget is created, we cycle through the coins in the world and listen out for their Delegate. When their delegate is triggered, we will call our “CoinCollected” function. This function increases our coin amount and sets the text in the widget to reflect the correct value.
There is a lot more to Delegates in C++, especially when you forgo the hooks to make them Blueprint compatible. Not every Delegate has to be a Dynamic Multicast Delegate. However, for our use case (Gameplay), the delegates we’ve used today are a great introduction to get started with Delegates as a whole. From here, you should be able to imagine some places you can apply this knowledge; such as replacing Tick functions where you’re checking values (and the changing of values) to a more Delegated approach.
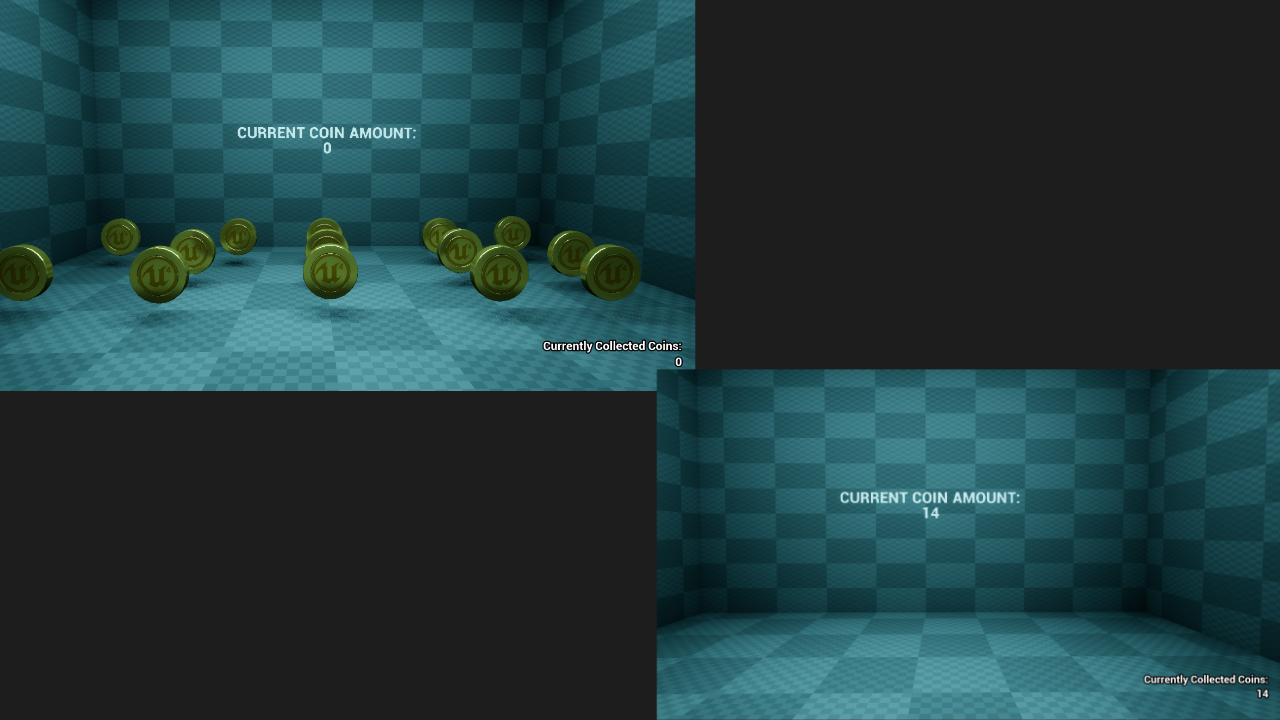 Collecting the coins updates both our Blueprint actor and the C++-backed UMG Widget.
How To Create Your Own
Creating a Blueprint Event Dispatcher
To create a Blueprint Event Dispatcher, open the Blueprint in question and head to the MyBlueprint tab (default location: Bottom Left). There is a section named “Event Dispatchers”. Click the Plus icon on the section header to create an Event Dispatcher.
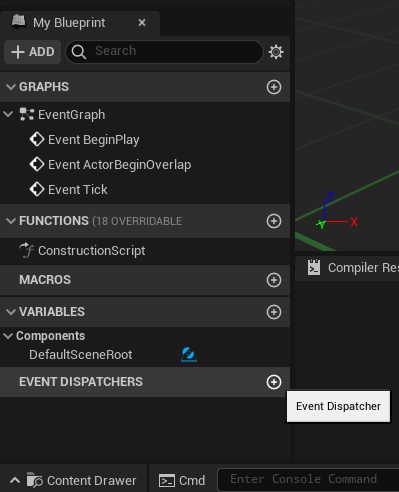 The Event Dispatcher section location.
Name your Event Dispatcher then if you need to add a variable to it, click the dispatcher and head over to the details panel (Default location: Right). Click the “+” on the Inputs section to create a new variable. Set it, name it and then compile and save and your Event Dispatcher is ready.
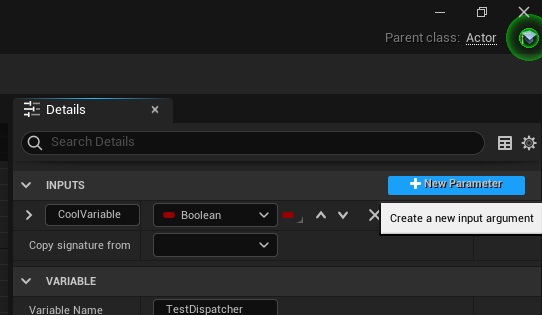 The Inputs location when you have a selected Event Dispatcher.
Creating a C++ Delegate
In the header above your class, you can add your dispatcher here. If you would like a Blueprint-friendly Delegate use DECLARE_DYNAMIC_MULTICAST_DELEGATE. If you need variables, you can use the Params versions; DECLARE_DYNAMIC_MULTICAST_DELEGATE_One_Param, DECLARE_DYNAMIC_MULTICAST_DELEGATE_Two_Params .etc. It is important to note that variables you introduce to these need Variable Type, Variable Name. Below is three examples of different Multicast Delegates.
DECLARE_DYNAMIC_MULTICAST_DELEGATE(FCoolDelegate)
DECLARE_DYNAMIC_MULTICAST_DELEGATE_OneParam(FStillCoolDelegate, float, fCoolVariableName)
DECLARE_DYNAMIC_MULTICAST_DELEGATE_ThreeParams(FSuperCoolDelegate, float, fCoolVariableName, bool, bCoolVariableBOOL, FVector, vSuperCoolVector)
As you may have noticed, the first parameter in these Macros is a made up name to call the Delegate.
If only one item should be attached to a delegate, as opposed to as many as possible - you could remove MULTICAST. This would mean your Delegate would be DECLARE_DYNAMIC_DELEGATE(FCoolDelegate). Remember that this Delegate can only be bound to a single place if you do this.
Dynamic Delegates are slower than regular delegates but they can be found by name in places.
Find where you want this Delegate to belong and if it is Blueprintable, add a UPROPERTY(BlueprintAssignable) macro above the declaration of the variable version of the Delegate. An example of this:
UPROPERTY(BlueprintAssignable) FKFOnCoinPickup OnCoinPickup;
Your Delegate is now ready to use. If you have set it up as a Blueprintable DYNAMIC_MULTICAST_DELEGATE, you can bind it or call it in Blueprints or in C++
To learn more about delegates, take a look at the Unreal Engine documentation to learn about cool extra things, such as adding return values and the UDELEGATE macro: Unreal Engine 4 Delegate Documentation.
Extras
Video
Project Files
The project files for this project (Unreal Engine 5.0 EA) are available here: PROJECT FILES

